This aerial image was taken with a Canon A490 with the IR filter removed and with a piece of Rosco #2007 filter attached.
Exposure time: 1/1250"
F4.5
ISO 160
Exposure time: 1/1250"
F4.5
ISO 160
Focus: Single Point AF
 |
| Aerial image at 150m |
I am testing this CHDK script for automatic exposure control, in the parameters you set a range of ISO, Av and Tv and the script calculates the best option at each photo. The only tricky issue with this script is that the lock focus and set focus to infinity doesn't work the same way on all cameras and if you are not lucky and the standard code doesn't work for you then you will have to figure out which are the right commands for your camera. I tested setting focus lock to infinity and also disabling lock focus and leaving the camera standard auto focus at each photo, and was getting better results with AF for my quad, camera, landscape configuration so I used that.
The purpose is to get a NDVI image and some insights on how proceed to get the best results given a set of amateur resources.
Rosco #2007 Infrablue filter
This infrablue filter is referred at Infragram to get better results with CCD cameras, although the results vary depending on the camera sensor (spectral response to NIR), camera settings (ISO, Av, Tv) and white balance. I am using a custom white balance calibrated with a piece of blue origami paper, that is proven to get better results.
 |
Rosco #2007 filter
|
Analyzing the color histogram of the photo can give us a hint of the quality of the resulting NDVI data. As NDVI is calculated from the difference of Red (NIR) and Blue channels, the separation between these two channels in the histogram is the key reference. For same scenario, the settings that get better separation os channels will likely get a more meaningful NDVI image. The main variables you can play with are:
- infrablue filter
- camera ISO, Av, Tv
- white balance
This is the color histogram of the entire image, that predicts a relatively good ndvi data as red and blue channels are at least well differenciated.
 |
| Color histogram from full image |
This is the color histogram of just one tree (marked at the image with a yellow square), where the difference between the blue and red levels is more noticeable:
 |
Tree selected for color histogram
|
 |
Color histogram from one tree
|
NDVI images
This are the NDVI images obtained using Fiji and PhotoMonitoring plugin, the color difference between them is the lut used to map NDVI float values to color.
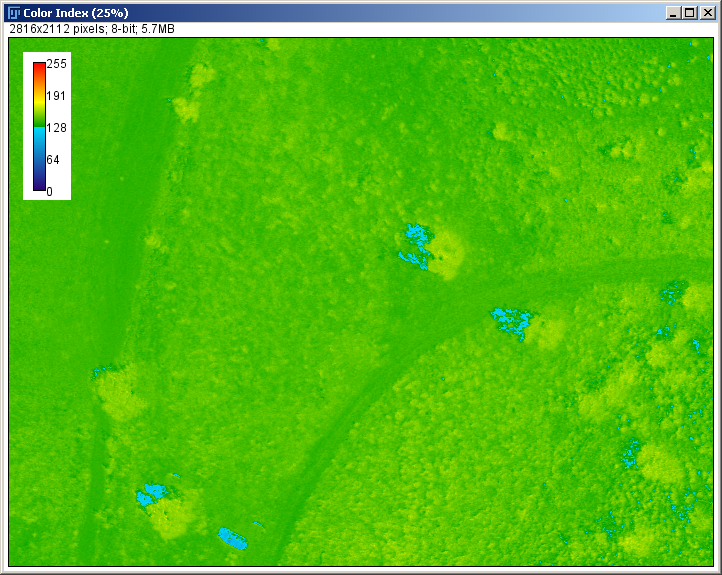 |
| NDVI using NDVIBlu2Red lut from photomonitoring plugin |
 |
| NDVI with special lut |
Conclusions
1. Using a filter means that less light is reaching the sensor, and that it will need longer exposure time to get the same energy, so Av and ISO should take this into account to get the shortest shutter speed and a clear photo. To get the same amount of light in less time lower F and higher ISO will help, but maintaining a reasonable range to avoid problems with too low F(too large deep of field, normally in aerial image we want the focus just in the ground) of too high ISO (noise). This image can help to understand:

This CHDK script can help you to get the best values for your specific situation: camera, ilumination, landscape colors, filter and uav performance about vibrations, but at the time of getting photos for a mosaic these values should be static, specially for getting a good NDVI mosaic where ndvi values can be compared between points that comes from different photos.
2. From the settings that influence the quality of the NDVI image, the only one that can be modified a posteriori is the white balance, and that just when you get a raw photo, so shooting raw will let us achieve better results. The downside of this is that taking the raw means more time between photo and photo, and that will impose a limit in your photo interval and then in the flight plan.
3. You can play with the lut to get the best result according to the ndvi image purpose, from the above ones you can see that with the special one a best differentiation of live/dead object is seen.
4. Each camera will get better results with different filter, so you can take a know good combination of both or experiment by yourself.
5. White balance is critical to get good NDVI data, getting the best calibration of custom white balance is the key, and that depends on the light source at the momment of getting the photo, so this is something that should be done in situ before placing the camera in the uav.
No hay comentarios:
Publicar un comentario